![]()
![]()
![]()
This tutorials will talk about picture effects.
The two basic picture effects explained here are :
![]() Transparency :
make a color transluscent (full transparency ie alpha set to 0). The others
pixels are full opaque (alpha set to 1).
Transparency :
make a color transluscent (full transparency ie alpha set to 0). The others
pixels are full opaque (alpha set to 1).
This effect was used in Tutorial 20.
![]() Mask effect :
combine two picturesn one is used for diffuse color, another is used for the
alpha layer (mask picture).
Mask effect :
combine two picturesn one is used for diffuse color, another is used for the
alpha layer (mask picture).
These utilities are available in PictureEffects.
More advanced effects are available with the
Bonzai Engine to generate normal
and dudv maps (port of ATI C code).
If you want to contribuate, don't hesistate to
send me your own effects.
Some pictures used here come from NeHe's lesson 20 and 22.
![]()
During the texture creation, the TextureLoader
starts by decoding the image file (through the use of
picture loader utilities). Decoded data can be easily retrieved from the
texture loader :
Picture picture = textureLoader.getPicture()
This introduction is aimed to explain the format of the decoded picture. Note
that this same format is directly sended to OpenGL for the texture creation.
Picture is an interface, which is implemented
by two RGBPicture and RGBAPicture.
Thoses classes describe respectively a RGB and a RGBA picture (RGB picture +
Alpha layer).
The picture interface contains thoses informations :
![]() width/height:
size of the picture (in pixels)
width/height:
size of the picture (in pixels)
![]() pixels:
the pixel buffer containing pixels colors. The format of this array is
describe below.
pixels:
the pixel buffer containing pixels colors. The format of this array is
describe below.
![]() Accessing methods for an easy edition of the pixel buffer.
Accessing methods for an easy edition of the pixel buffer.
![]() Other properties such as the number of components, ...
Other properties such as the number of components, ...
Pixels is a one dimentional byte array, which contains
a succession of pixels. I will only talk about the rgba format, the rgb format
is the same without the alpha channel.
The size of the array is the number of pixels multiplied by the number of
channels (color components). The rgba format have 4 channels (one for r, one for
g, ...) and the number of pixels is the picture width*height.
So, the total size of the buffer will be: 4*width*height.
The picture underneath shows how a 2D picture is linearized into a one
dimensionnal array.
Each lines of the picture are written side by side in the array.
Line i boxes refers to ith
horizontal line of the picture. On the second part of the picture, a zoom
describe the organization of the pixel components. The first r, g, b & a
tuplet correspond to the bottom left pixel of the picture. Each
component is a byte, and takes one octet (8 bits).

Representation of the color array
A pixel coordinate (row, line) in the picture space can be
easily converted to an index in the pixels array, like shown underneath :
r = pixels[4*(row+line*width) ]
g = pixels[4*(row+line*width)+1]
b = pixels[4*(row+line*width)+2]
a = pixels[4*(row+line*width)+3]
Now that we have seen how picture are stored in memory, I will
show you few basic effects based on the manipulation of the pixel datas.
This effect add transparency on some particular pixels of a
picture. It was used for rendering text, in the previous tutorial, with correct
occlusion .
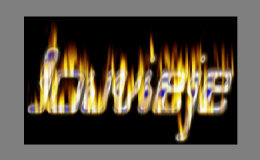
Here is an exemple of the effect. The original picture is as follow, the
effect will be used to set full transparency pixels are black.

Transparency effect source image
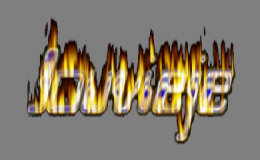
The result of using such effect is shown underneath by comparing with the use of the orignal picture (the clearing color is grey) :


Transparency effect result
Now, I will explain you how to achieve this effect.
As we will add an alpha layer, the destination picture will be a RGBAPicture.
For each pixels, we will copy the rgb color from the original picture to the
new picture. If the color is equal to the transluscent color alpha will be set
to 0, else it will be set to 255 (opaque).
This is done by this little code :
Transparency effect |
public static RGBAPicture createsAlphaLayer(Picture picture, byte[] transparentColor) |
This effect is a an extention of the previous effect. This
effect is a lot more powerfull, as we can have more possibility to choose the
transluscent pixels.
Instead of selecting a color as the transluscent color, we will use here two
pictures. The first picture will be used for the final rgb color ('texture'),
the second picture (mask) will be used for the final alpha color.
This effect is introduced with thse few pictures :


Sources pictures ('Texture' and Mask)
The result of the effect is shown as below (clearing color is the grey) :

Mask effect result
The picture generated will have the same size as the mask
picture. If the 'texture' picture have a different size, it will be repeated. A
variant of this effect can enlarge or shrink the 'texture' picture if the size
is different.
First, we process the mask picture and copy the alpha to the output picture. In
a second time, we copy the rgb color from the 'texture' picture.
This effect is done with this little code :
Mask effect |
public static RGBAPicture createsMaskEffect(Picture mask, Picture texture) |
"Software picture" or picture generated at runtime can be
used for creating textures. The pixel array will be filled manually, instead of
Here is a strange picture generated at runtime :

Software picture
You can create this picture using this code :
Software picture |
//Create a new 256x256 picture |
To use the generated picture, we will first convert it into a texture :
Creating the effect and its texture |
//Load pictures
orignal picture (TextureLoader.readPicture & TextureLoader.getPicture can
be used) |
Picture generated contains alpha layer, so the texture will
also contains alpha values.
By default, blending is of which disable the use of the alpha components. So, we
need to enable it and set the appropriate mode for blending. For more details on
blending, go to Tutorial 9.
Here is the blending functions that I use in this tutorial :
Blending |
//Mix color using the alpha component of the source (the effect picture) |
![]()
F : show the following effect
P : show the previous effect
![]()
Remember to download the GraphicEngine-1.1.2 to run this tutorial !
Tutorial 21 src (399 ko) //Port to Jogl JSR-231 initially done by Magarrett Dias
If you've got any remarks on this tutorial, please let
me know to improve
it.
Thanks for your feedback.
![]()
![]()
| Copyright © 2004-2012 Jérôme Jouvie - All rights reserved. | http://jerome.jouvie.free.fr/ |